Happy Fall! Around this time of year, I love apple picking, pumpkin patches, haunted houses…the usual festivities, but I miss those dang fall donuts! It occurred to me, I need to veganize a pumpkin donut recipe! They were so much easier than I expect for making donuts too!
Below, I have shared the ingredients and directions and then some useful tips that I found while cooking below that (substitutions, brand recommendations, etc.)
Ingredients:
Donuts:
- 1 Tbsp flax meal1
- 3 Tbsp water
- 1 3/4 cup sifted flour
- 2 tsp baking powder
- 1/2 tsp salt
- 1 tsp pumpkin spice2
- 1/2 tsp nutmeg
- 3/4 cup pumpkin puree (not pie filling)
- 1/2 cup brown sugar3
- 1/3 cup vegetable oil
- 1 tsp vanilla
- 1/2 cup any non-dairy milk
Topping:
- 1 stick unsalted vegan butter4
- 2/3 cup granulated sugar
- 1 Tbsp cinnamon
Directions:
- Preheat your oven to 350 degrees Fahrenheit. Make sure the rack is centered.
- Generously grease a 24-cup mini muffin tin or a donut tin with nonstick spray or some vegetable oil with a paper towel.
- In a small bowl, whisk together 1 Tbsp flax meal with 3 Tbsp water and let it sit for at least 3 minutes. This allows the mixture to become gelatinous, egg-like.
- Sift5 flour into medium mixing bowl. Mix in baking powder, salt, nutmeg and pumpkin pie spice.
- Put the pumpkin puree in a separate large mixing bowl and mix in brown sugar. Make sure this bowl is bigger because you’re going to mix the dry ingredients into this bowl!
- Mix in the vegetable oil, vanilla extract, and add the flax egg. Pour in milk, and mix until smooth.
- Add the dry ingredients to the bowl with the wet ingredients and stir until the dry mixture is completely mixed in, no clumps. Be careful not to overmix the batter.
- Scoop the batter into your tin, about ¾ full each. Bake at 350 degrees. About 10-12 minutes for the donut holes, or until a toothpick comes out clean.6 Bake the 4-inch donuts for about 15-20 minutes.
- While the donuts are baking, melt the butter in a bowl in the microwave (about 1 minute). Allow the butter to cool before dipping the donuts in the butter. Also, mix the sugar and cinnamon together and pour part of the mixture on a plate or leave in the bowl to get ready to roll the donuts. Last thing before the donuts come out, set up a baking sheet or plate with parchment paper to set the donuts on after coating in sugar.
- Remove the donuts from the oven and allow to cool just enough to handle.7
- Dip the donut holes in the melted butter or brush the butter on with a basting brush, and roll to coat in cinnamon sugar.
- Serve warm if possible. Fall donuts are better warm!8 Enjoy!
Makes about 36 donut holes or about 1 dozen 4-inch donuts
Tips!
- Flax meal works best, but flax seed also works! You can also throw flax seed in a blender, bullet, or food processor to get flax meal.
- Pumpkin spice sure makes the recipe easier, but if you don’t have pumpkin spice, you can substitute 1/4 tsp of each of the following: cinnamon, ginger, nutmeg, and cloves/allspice.
- Don’t have brown sugar? In a separate bowl, thoroughly mix 1/2 cup white sugar with 1/2 Tbsp of maple syrup or molasses.
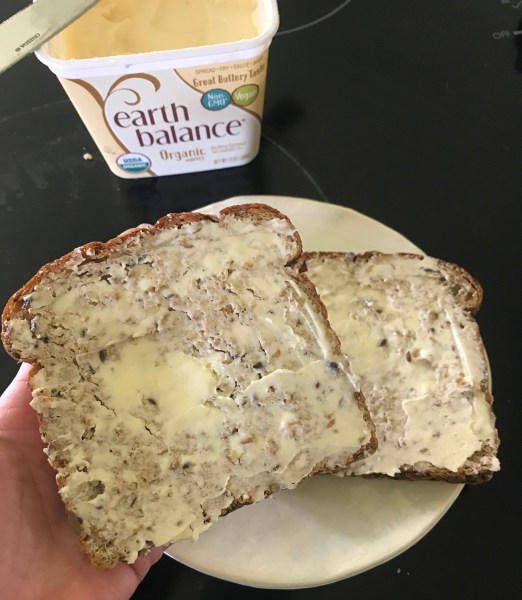
- You can buy sticks of butter that are vegan brands like earth balance, but brands like Country Crock and I Can’t Believe It’s Not Butter have vegan butter as well. A quick hack with these brands that aren’t fully vegan, look at the ingredients list to see if it says at the bottom of the list “Contains: Milk.” If it does not say contains milk, you should be good! Milk is an allergen and by law must be clearly labeled.
- If you don’t have a sifter, you can use a spaghetti strainer or similar to sift. I have a metal spaghetti strainer that I use when a recipe calls for sifted flour.
- If your last batch of donuts does not fill the whole muffin tin, before popping them in the oven, fill the empty spots up about 1/4 of the way with water to ensure even baking of the batter.
- After removing the donuts from the oven, I took them out of the tin as soon as I could so they would cool faster and so I didn’t burn my fingers on the pan. I just dumped them out on a clean cookie sheet, but you can also use a spoon to scoop them out onto a plate or pan.
- If you have leftover donuts, place the donuts on top of a paper towel in a container put them in the fridge overnight. Try to make sure the donuts aren’t touching if you can.